I’ve just had a chance to watch a preview recording of Shane Hurlbut’s cinematography workshop: “The Illumination Experience”. The 25-city tour ends this weekend in Los Angeles and I’m really disappointed that I never got a chance to see the show in person but luckily the entire workshop exists as a DVD or HD-Download so if you missed it like me, you can still get the (nearly) full experience.
So let’s just get this out of the way: Shane Hurlbut is a maniac. As many of you have seen for yourself, that dude is a force of nature. Yes: he shoots big movies and brings top-shelf, ASC-level credentials to the table but beyond that, he brings a level of energy and passion for cinematography education that is unrivaled.
Rather than offer a straight play-by-play, I thought I’d walk through the Top Five things that I personally learned about cinematography by watching Shane’s workshop:
1) THE CONCEPT OF THE KEYFRAME
If you had to convey an entire scene in one image, what would that image be? This is one of the best lessons in the entire workshop. It’s something that we all do unconsciously when we read scripts: certain images resonate in your brain and those “key” images inform the design of the entire project. The lesson that I learned here from Shane is to make that unconscious process much more conscious and to deliberately decide on a key image for every scene, which then informs the rest of the scene. It’s also a safety so that, if push comes to shove and you have to start combining shots, you’ve already decided the most important image to capture. Great idea.
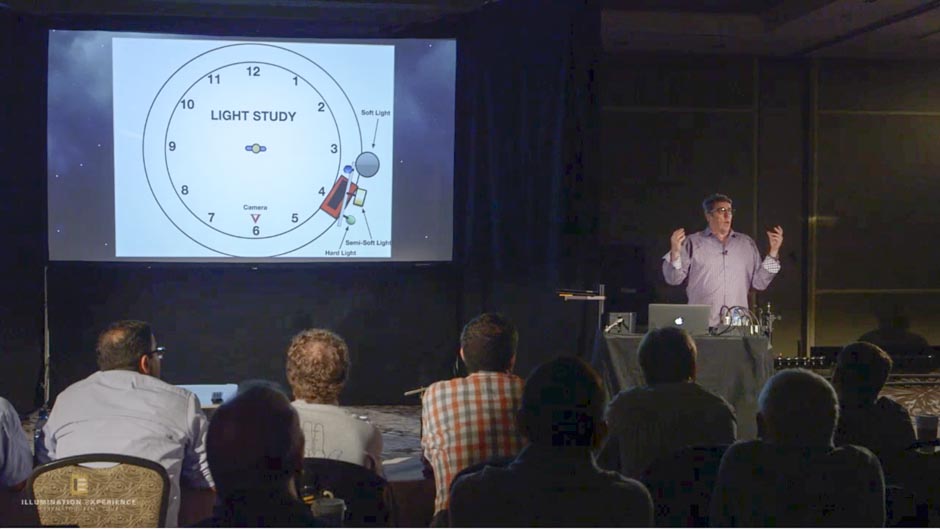
2) THE LIGHT STUDY
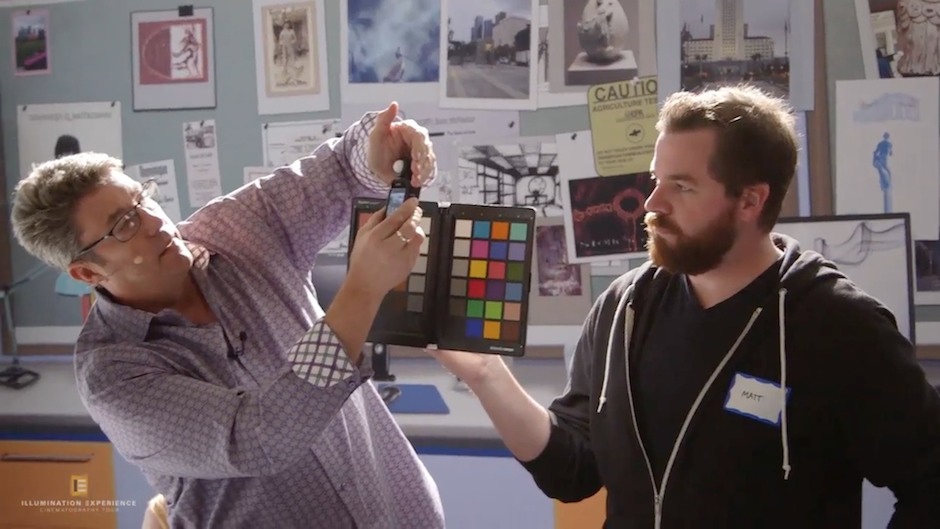
One of the most elaborate constructions of the workshop is something that Shane jokingly calls “The Pirate Ship”. It’s a circular dolly track with multiple light sources — a bounce source, Kino source and a hard Fresnel source — mounted to the boom arm of a Fisher10 dolly. Shane places an actor in the center of the circle and is able to quickly test how different types of light sources look on the actor’s face at different angles.
In this section, Shane also mentions his background as an assistant to legendary still photographer Herb Ritts – where he lit some of Ritts’ most iconic photographs – and you can really tell that Shane has some deep knowledge to share about lighting the human face.
What I really appreciate about this section of the workshop is how Shane digs into the subtleties of lighting. Anyone can pickup a cinematography book and learn the basics: key light / fill light / back light…Shane really takes the time to demonstrate the nuances of how you set those lights. By identifying the classic key light positions, i.e. “The Wedge / Rembrandt Position”, “The Eye-Shadow Position”, etc. — he shows you how moving the key around the actor even a few degrees can dramatically change the feeling of the shot.
I’ve shot plenty of camera tests during prep but they often feel more techie than creative. Shane’s concept of shooting a “Light Study” of the actors is such a smart way to use that precious prep time to make creative discoveries about how you’re going to light your actors.
3) LOOK BEFORE YOU LIGHT
Shane explained that his approach to any new location is to first setup the camera and see what’s happening naturally. He’ll scroll through color temp settings to see how the existing light is reacting and scroll through ISO and lens settings to see how much additional light he actually needs.
I am absolutely guilty of the opposite approach: get the electrics working and start blasting light around the set before the camera is even setup. It feels proactive and responsible but it definitely can lead to doing way more work than is necessary. It can also mean that you never saw the bit of magic that was happening naturally. The bottom line is that today’s camera sensors are so sensitive, it’s worth looking at the natural light on camera before you start pulling out the big guns and spending hours lighting a set when maybe all you really needed was a touch of fill light.
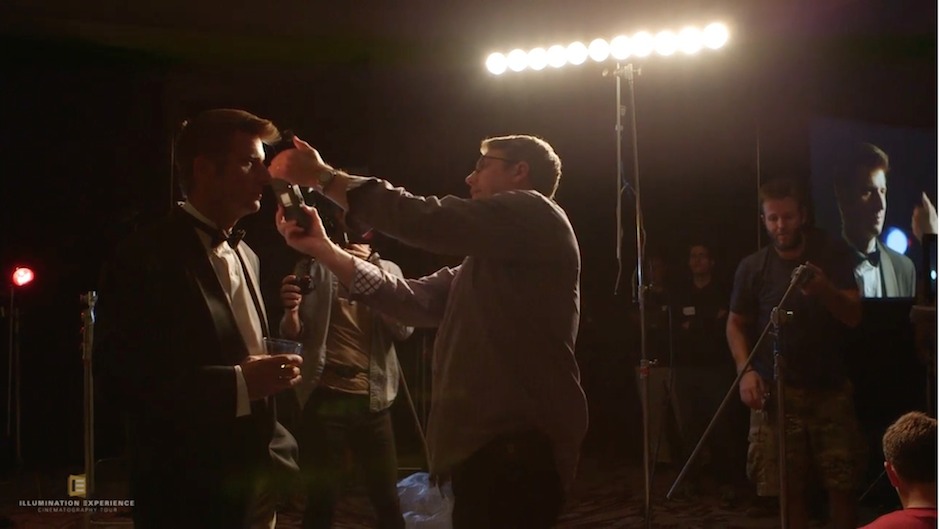
4) DIY LIGHTING
One of the most fun turns in the workshop is when Shane demonstrates how he lit a portrait shot from “The Rat Pack” using traditional lighting instruments: Chimera key, Leko backlight, Kino fill light. But then he switched gears to DIY-mode and recreated the exact same look using a lighting package sourced from Home Depot for about $200.
It’s tempting to see these unconventional lights and assume that they’re just a parlor trick for the sake of a workshop when in fact these are totally legitimate tools that are used on movies big and small. Shane mentioned he’s used home-made batten strips on almost every movie he’s ever shot, from “We are Marshall” and “Terminator Salvation” to “Need for Speed” and his newest film, “Fathers and Daughters”. There’s another pretty good cinematographer named Roger Deakins who’s also a big fan of batten lights – he uses them all the time for the same reasons that Shane demonstrates.
5) THE 33% RULE
This is my favorite lesson from the whole workshop. It’s not techie; it’s not a lighting lesson or a great new piece of gear. It’s way more important than all that – and something that I’ve felt for years but never quite articulated out loud.
Shane explains that there’s a temptation to define the role of a cinematographer as simply, “helping the director manifest his vision”…but that is actually only a small part of your job as a cinematographer – 33% to be precise.
Another 33% of the job is motivating the crew and keeping all of the departments working together making the same film. This is actually the same advice I was given by Don Burgess, ASC on my very first job in the film biz – as a camera intern on “Twister”. I used to tag along behind Burgess, constantly asking, “How many stop are you underexposing the shadows? How many stops are you letting the skies overexpose?…” He finally said to me: “You gotta learn that being a cinematographer is not just about F2.8…” A third of the job is being the below-the-line leader; to inspire the troops and keep the peace when the hours get long or the budgets get cut.
As Shane explained, the final 33% is working with the producers to stay on schedule and on budget. I actually found it really gratifying to hear Shane say these words out loud. Sometimes you can find yourself in a tug-of-war between the director and the producers, and you may feel like you’re somehow selling-out if you sympathize with the plight of the producers, but the fact is: you’re all making this movie together. The producers are not your enemy and the sooner you realize this, the faster you’ll be treated like a professional.
Of course, all of these hats you wear are ultimately in service of the director’s vision and this “33% Rule” is a great way to keep it all in perspective.

Needless to say, these Top Five lessons are just the tip of the iceberg. There were so many other take-aways for me personally, ranging from a really smart way of logging your camera data for eventual re-shoots to some innovative new tricks with MoVI operating to some great advice about how to prepare for job interviews with directors. The Cinematography Workshop program is over 7 hours long and if that’s not enough for you, there’s a second program that covers the separate full-day Lighting Masterclass portion of the tour.
Speaking as both a cinematographer and as someone who spent last summer on a cinematography workshop tour myself, I was really blown away with how much I learned from this program.